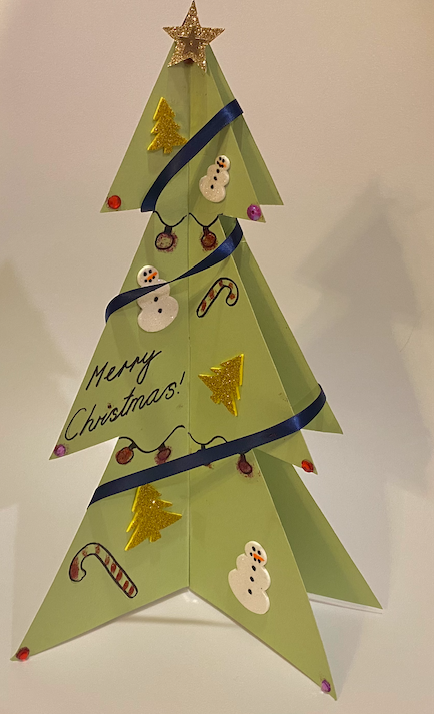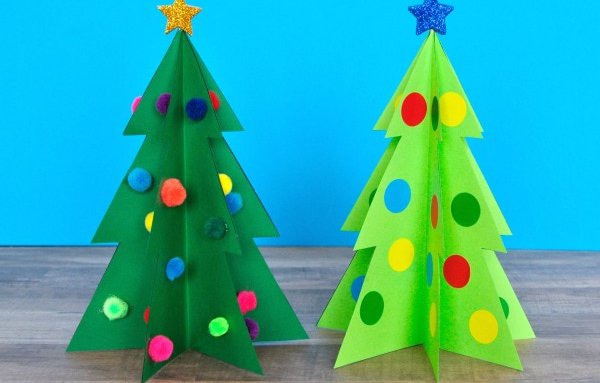
Have a go at creating your very own 3D Christmas trees! Christmas crafts are a great way to bond with your child and decorate your home in time for the festive season.
These simple and colourful Christmas trees are easy to make and don’t require many supplies. Decorating your trees with different colours and decorations will encourage your child to express their creativity as they make it unique to themselves.
You will need:
- Green coloured card or paper
- Decorations (stickers or ribbon)
- Glitter
- Glue
- Scissors
- Tape
- Marker
Method:
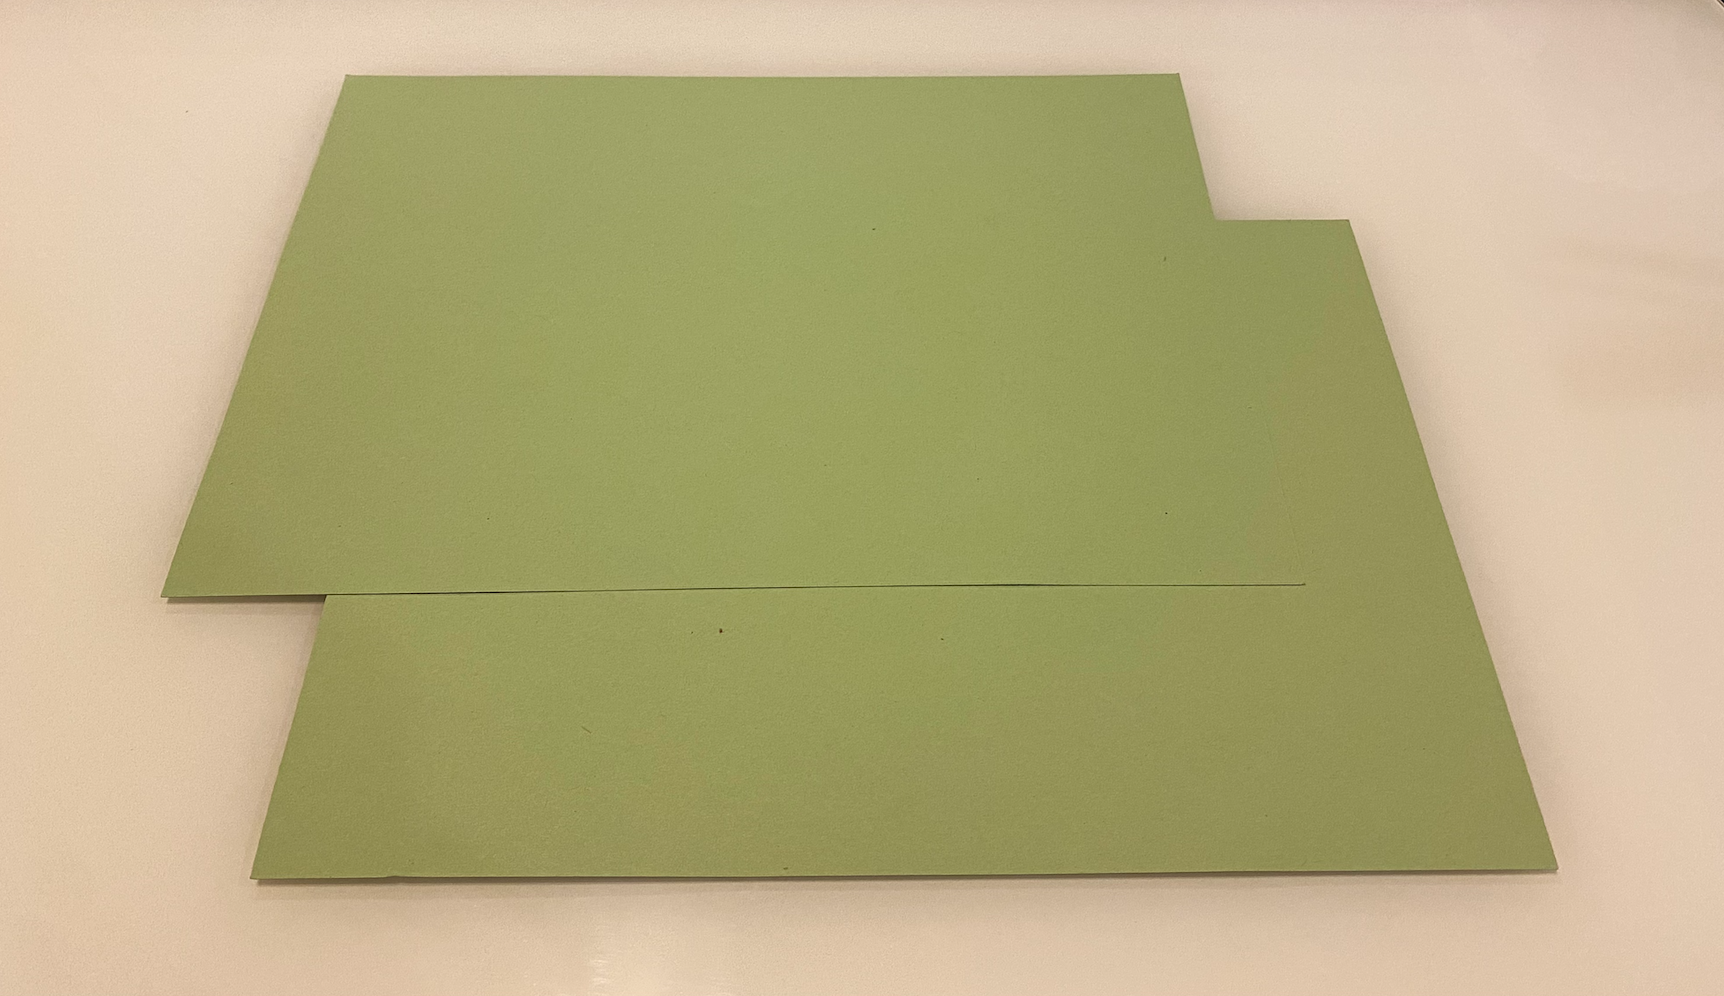
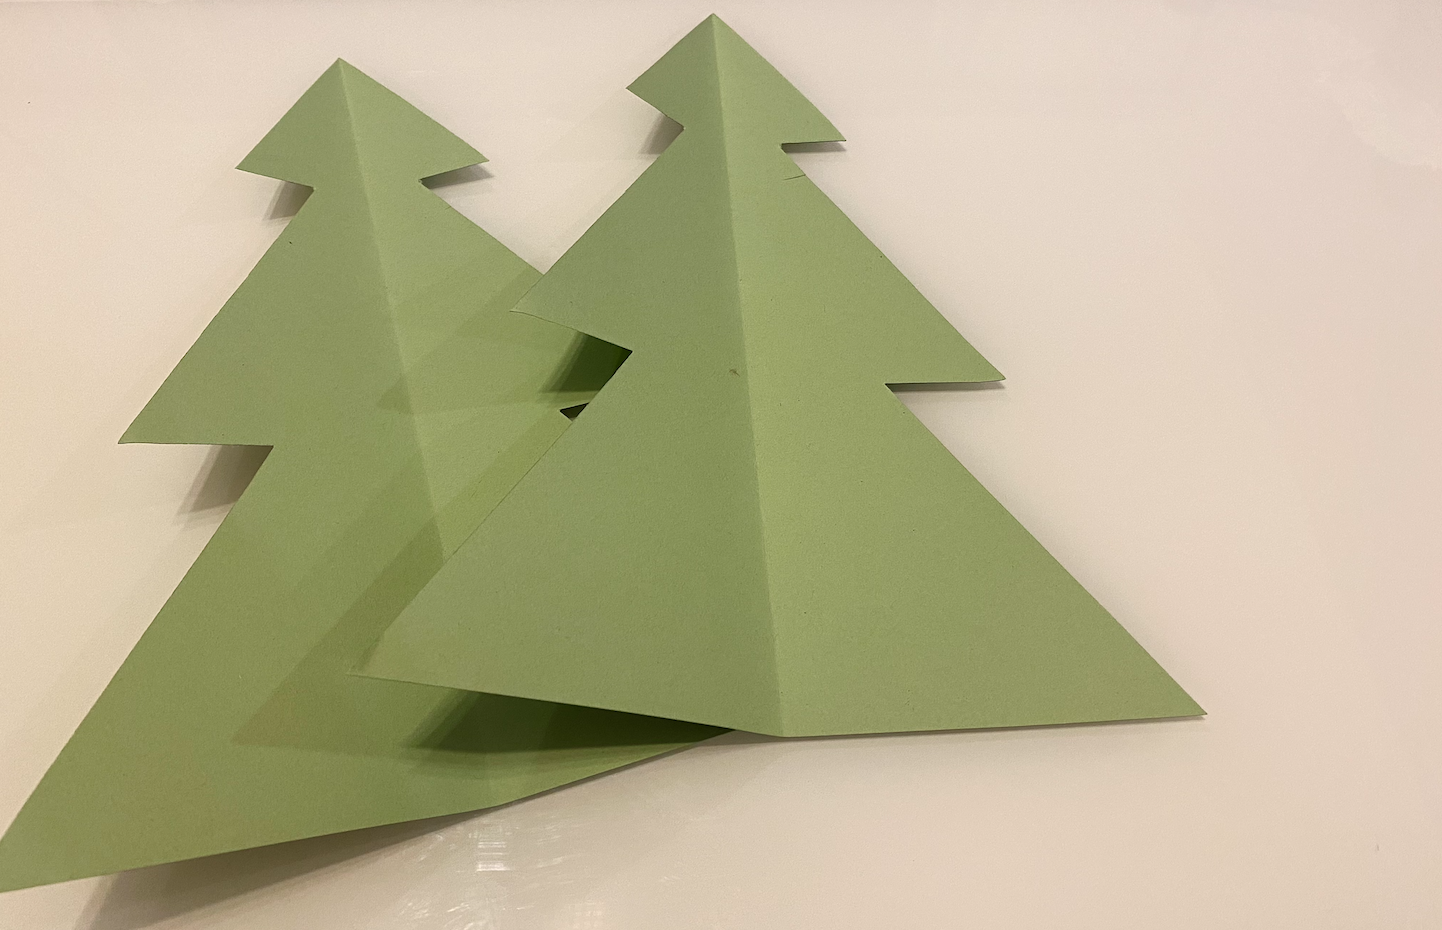
- Take two pieces of your green coloured card and stack them on top of each other.
2. Take your stack and fold your papers in half lengthways. On the closed-sided length, draw a half-tree shape with a marker.
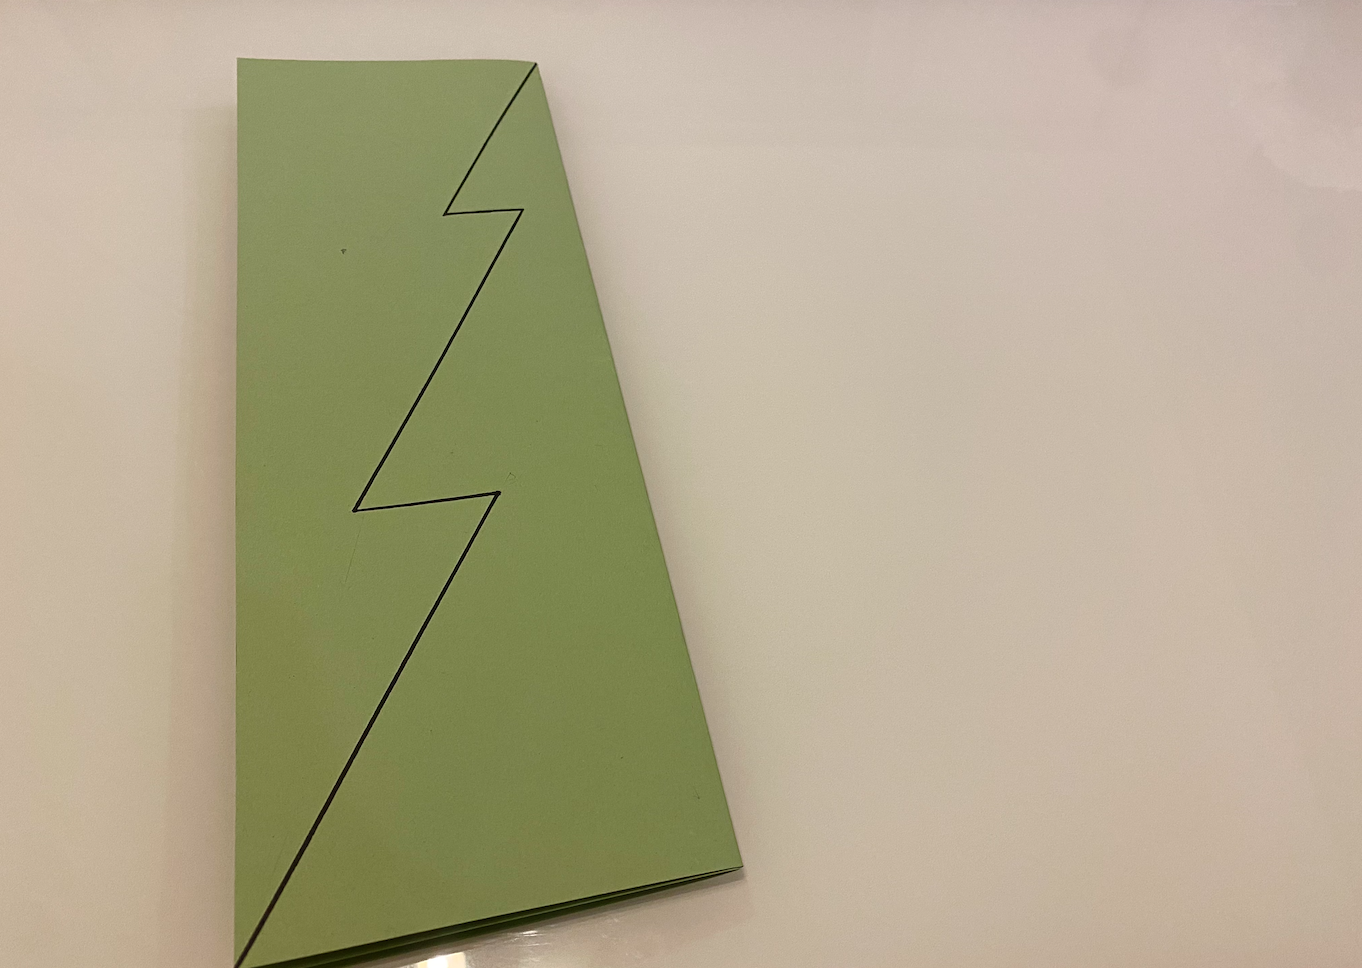
3. Cut along the marked lines and open your paper. You should now have two identical tree shapes.
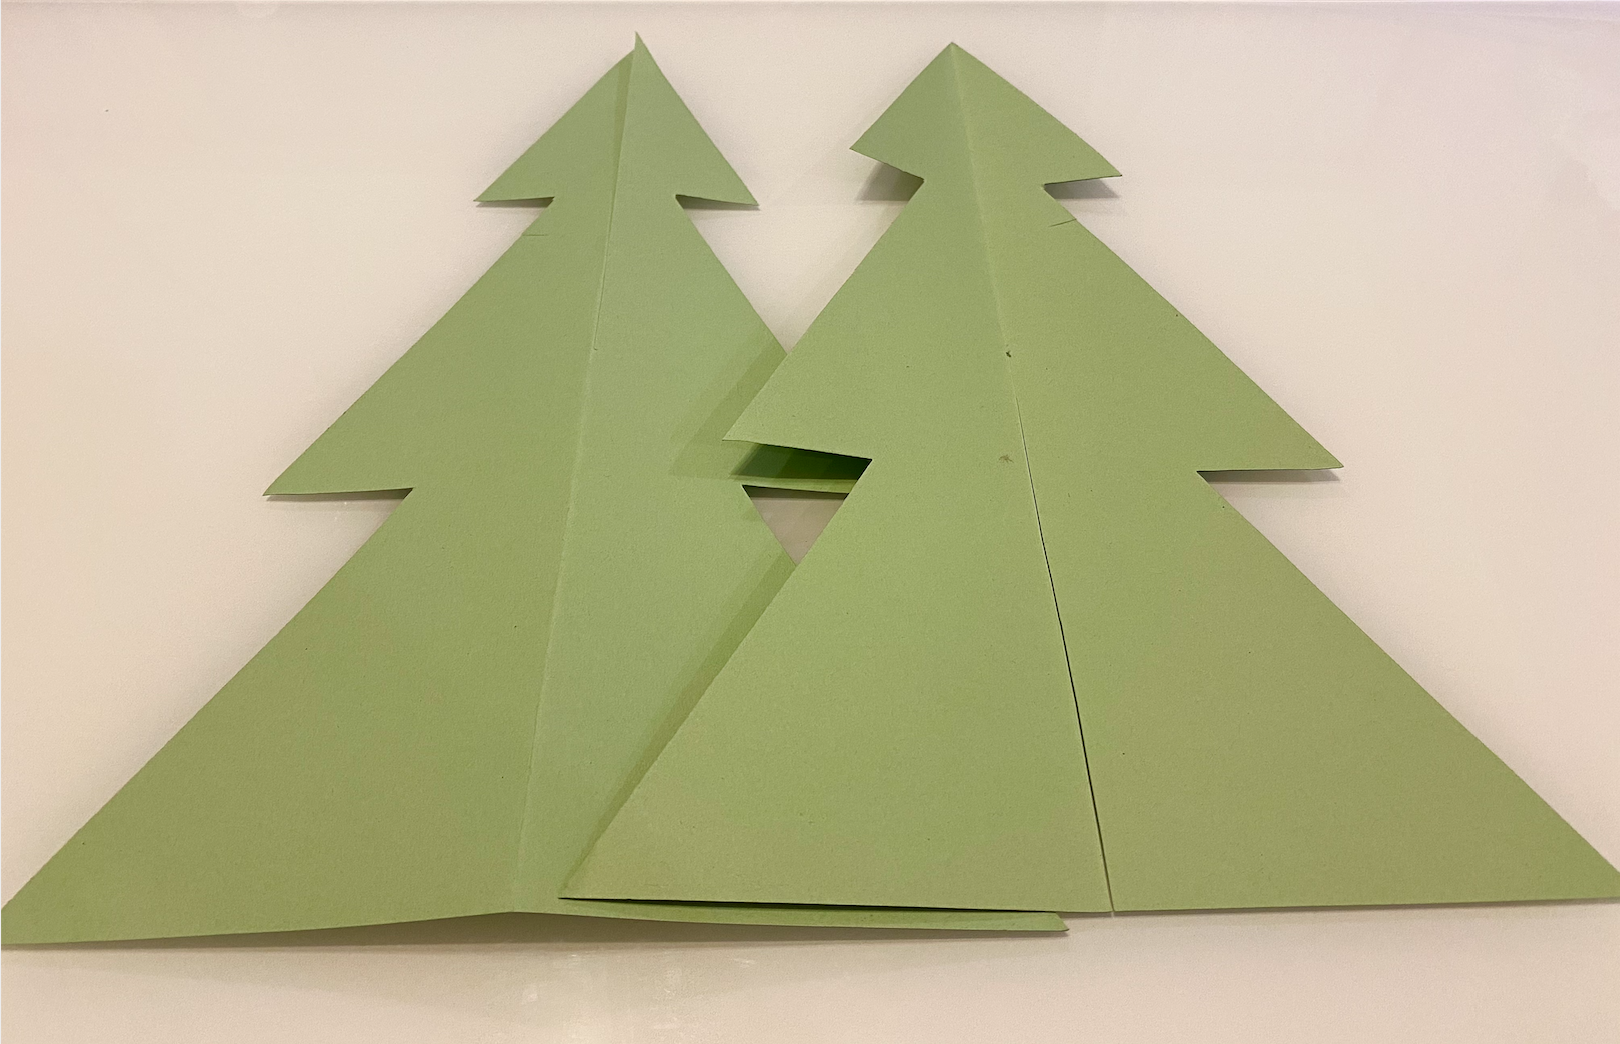
4. Next, cut slits in the tree shapes. To do this, mark the vertical centre of each tree and lightly fold lengthways along the centre. Cut a slit in one tree from the top down to the centre and cut another slit in the other tree from the bottom up to the centre.
5. Join the two shapes to form a tree and fold the tree open so that it stands on its own. You can use tape to secure the two pieces in place.
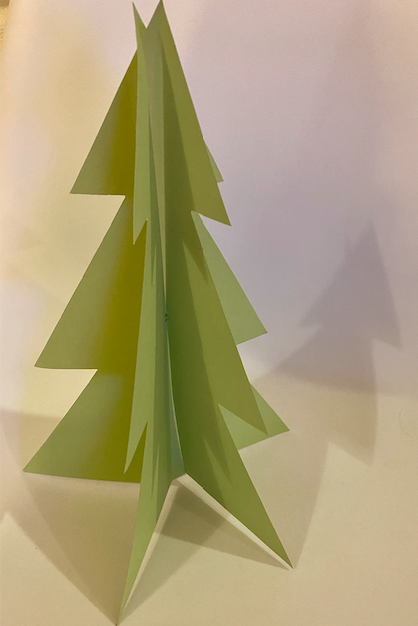
6. You can now use your decorations to decorate your tree however you like!